Nixtamalization Of Corn: Ancient Secret Of The Americas

Nixtamalization Of Corn: Ancient Secret Of The Americas

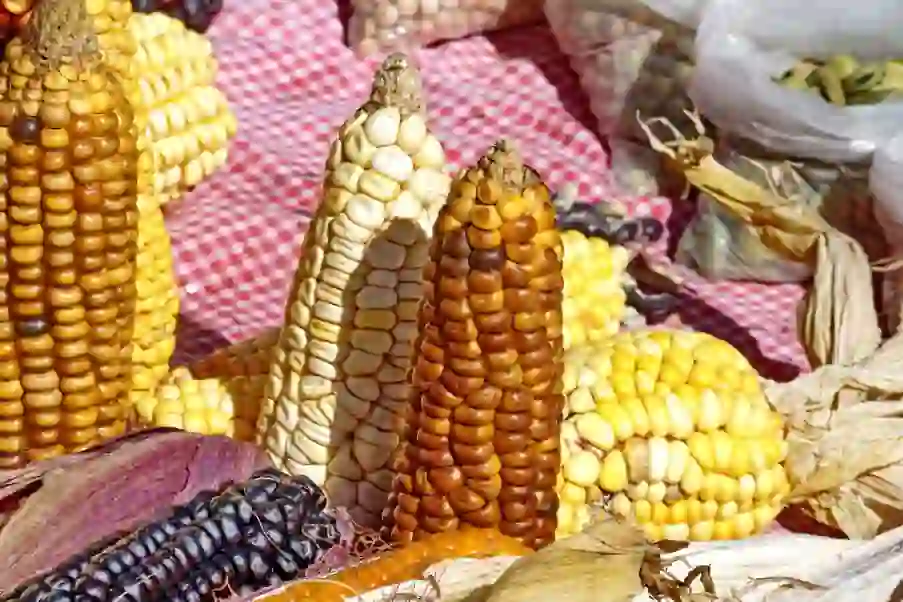
Impossible to talk about beans (see previous post) without alluding to their twin sibling maize. Domesticated as long as 8700 years ago in the low-lands of what is now Oaxaca in southern Mexico, corn is not short on history. But when corn was introduced to the world by the Spanish, they left behind one vital ingredient

Nixtamal: Secret Of Ancient America

By reputation corn is considered a second-rate grain: relatively low in protein, high in carbs and lacking in key vitamins and other micro-nutrients. Think polenta, tasty only as its companion sauce

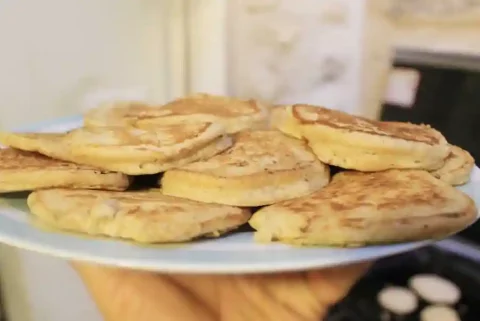
Now, consider Mexican tortillas fresh off the skillet. These also contain tasty fillings, but now they complement the delicious taste of corn which holds centre-stage. And with taste comes nutrition. This corn has more protein and a significantly greater range of vitamins and minerals. The difference? A 1500 year-old process unique to pre-colombian Central America: nixtamalization (more…)

A Flavorful Fiesta: Cooking the Perfect Mexican Black Beans

A Flavorful Fiesta: Cooking the Perfect Mexican Black Beans

Authentically Mexican Black Beans

Beans have been a staple of traditional Mexican and other American societies since antiquity. Paired with maize or corn they’ve been providing complete protein and energy to entire civilizations for millennia. Black beans are also rich in micro-nutrients, with plentiful amounts of folate, vitamin B1, iron and magnesium

Here in Europe, we tend to think of refried Mexican beans, that réchauffé of beany nectar days in the making, sautéd with garlic, chilli, cumin and aromatic herbs and spices, more delectable with each day it matures (more…)

Homemade Baked Beans Recipe: À La Différence

Homemade Baked Beans Recipe: À La Différence

In an age conscious of the health and financial costs of relying on ready-made processed foods is it time to call time on the oh-so-sweet baked bean? Not at all! Packed with protein, energy, fibre and essential vitamins and minerals, beans are among the tastiest and nutritional foods you can eat.

While a tin of baked beans is merely convenient, real home cooked baked beans are a world apart. Moderate the sweetness in this savoury dish, sweeten with something healthy and replace modified corn starches and herb extracts with tomatoes and real herbs and spices, and baked beans become a star dish, tasty enough to blow your palate, without blowing a hole in you pocket or the planet’s resources

Best Homemade Baked Beans

À La Différence

This article guides you on selecting and combining flavorful ingredients for rich and savory sauces to coat each bean to perfection. From choosing your beans to using the best the best cooking technique and having fun with condiments, we’ll cover it all. Armed with a cupboard-full of tricks and tips you’ll have a wealth of ideas for transforming a simple side dish into the star of any meal

Baked Beans – A Potted History

Baked beans date back to the early English colonists of modern-day New England in the 17th century. Though beans had been a staple of European cuisines since the middle ages, the baked beans recipe we know today was more likely adapted from the cuisines of Native Americans who slow-cooked beans with maple sugar and bear fat in clay pots placed in fire pits 

With time maple syrup gave way to brown sugar and later molasses. Though traditional baked beans are still served in parts of the US, modern-day commercial baked beans are usually sweetened with sugar, though some healthier varieties use anything from apple juice to stevia. They are cooked on the stove-top and not baked at all

Baked Beans: A Personal History

Our baked beans go back to the mid-2000’s when our Mexican friends Claudia, Mónica and Marcel were staying with us in East London. We wanted to show them a traditional British Sunday breakfast down the local caff: they loved the instant coffee, white toast with cheap margarine, pork bangers, mushrooms and bacon. Then Claudia made a face: “sweet beans? Wákala!” (yuk!)

Obviously they didn’t go to waste. I grew up with baked beans and love them. But I did think it might be time to come up with a proper homemade baked beans recipe that was more delicious, definitely nutritious and fit for a Mexican

WHICH BEANS TO USE?

Baked beans are typically made from white beans such as haricot, or cannellini, but any bean is good. You can even mix different beans for a multi-coloured version. I’ve tried everything from pinto beans to baked chickpeas – they’re all fantastic!

USING CANNED BEANS

This is one instance where using a can of precooked cooked beans still gives decent results. Canned baked beans made entirely on the cooker-top can break up a bit and are best prepared using the oven-baking method

PRE-COOKING YOUR BEANS

Pressure cooked beans don’t technically need pre-soaking, but they will cook more evenly and also quicker when soaked. I strongly recommend soaking the beans for at least 8 hours, and preferably overnight

Throw the soaked beans in a pot with 4 times their volume of water. Salting produces a bean with a firm skin with a lovely creamy centre. If you like your beans soft, add the salt after the initial pre-cooking stage

Cooking times vary with the type and age of your beans, your pressure cooker and even the altitude of your kitchen (if you live in a high place you’ll know that water boils at a lower temperature)

PRESSURE COOKING BEANS

As a rule of thumb cook soaked white beans for 6-8 minutes at high pressure then turn off the flame and let the pressure reduce naturally to ambient – around 10 minutes

Unsoaked beans will need 30-40 minutes of pressure cooking on high before returning to ambient pressure with the valve still applied

If in doubt, undercook your beans, let down the pressure and check them. Overcooked beans are great in soups, but will be no good in your baked beans recipes

COOKING BEANS IN A CONVENTIONAL POT

If you don’t have a pressure cooker soak the beans for 8-12 hours and simmer in fresh water for an hour or longer until the beans are tender but hold their shape

Check this handy chart of pressure-cooking times for beans and other items

TOMATOES

Tinned tomatoes are great. Often better than the tasteless off-season ones you get in supermarkets. But if you have access to decent fresh plum tommies, it’s a no brainer. Cut them in four, throw them in the blender with a drop of water and blitz them till smooth. No blanching, no peeling, no chopping, no sieving. Tomato skin is full of healthy lycopenes, and you’re throwing away too much flavour by discarding the seeds

SWEET – SOUR

Traditional baked beans are sweetened. How sweetened they are depends on you. Bear in mind this is a savoury dish. A bit of acidity will perfectly balance the sweetness. It’s generally advisable to keep any acidity low. And since it’s not an element of the original recipe, maybe you’d prefer to leave this out altogether?

I’ve known chefs use tomato ketchup. Fair do’s. But if it’s sweet and sour you’re after there are plenty of options. Check out some of the many ways to add sweetness and acidity in the chart below:

SWEET

SUGAR: jaggari, muscovado, demerara, (white?)

NECTARS agave, maple, coconut, honey
OTHER pomegranite or blackstrap molasses, stevia, xylitol
SOUR

VINEGAR malt, wine, cider, sherry, rice

CITRUS lemon, lime, bergamot, yuzu
OTHER tamarind, dried mango powder

UMAMI

Along with onions and garlic, carrot and celery constitute the dynamic duo of Italian soffritto (French mirepoix), a savoury base used in a number of sauces, including tomato. They are packed with umami (deliciousness) and impart a gentle sweetness to the sharpness of the tomato. They also add body,  helping to thicken the sauce so you’re less likely to need to resort to thickeners such as corn starch

Japanese for deliciousness, umami is your body’s ability essentially to detect protein. Free amino acids such as glutamate and guanylate from protein breakdown are registered as a savoury deliciousness. This is why two or three day old refried beans taste even better than freshly made

The most traditional baked beans recipes call for slow baking in a sealed clay pot for several hours to develop that delectable umami

You can add further umami in the form of fermented pastes such as Japanese miso, Korean doengjang and gochujang or Chinese yellow or black bean sauce, to name just a few sources. I can’t see that commercially synthesized monosodium glutamate used in the right amounts would do any actual harm, but somehow I can’t help feeling it’s just too much like cheating

BAKED BEANS – VARIATIONS AND ADDITIONS

If restraint is your thing, simplicity will always yield a good, clean result. However, if you’re not one for keeping things simple you can really go to town here

Beans and tomato love a bit of chilli, and you can add that touch of piquant heat in several forms, from straight up chilli powder to your favourite chilli sauce. Try smoky Spanish la Vera paprika. Or gochujang, a fermented traditional Korean rice and red chilli paste

Za’atar is a wonderful Palestinian blend of oregano, marjoram and thyme with ground sesame, sumac and salt. Using any of the above herbs singly or in pairs gives equally great results

Try these condiments:

chipotle in adobo, guajillo, pasilla, ancho and just about any other fresh or dry chilli. Herbs: epazote, hoja santa, oregano ...
MEXICAN
cumin, garam masala, black cardammon, fenugreek, asafoetida ...
INDIAN
gochujang, doengjang, miso, ginger, sriracha, shichimi togarashi, black bean sauce, sesame oil, sichuan pepper ...
FAR EAST
sumac, ras el hanout, preserved lemon, za'atar, nigella seeds ...
MIDDLE EAST

THICKENING BAKED BEANS

We are used to pre-cooked tinned baked beans having a lovely sheen. This is due to the use of corn starch as a thickener. While corn starch gives a nice shiny glaze, if your sauce needs cornstarch it may be that it’s just too thin. The carrot and celery soffritto above will, when liquidized or cooked sufficiently dissolve to give body. On the other hand, the best thickener for tomato sauce will always be tomato

RECIPE FOR BAKED BEANS

baked beans
Baked Beans A La Différence
Prep Time 15 minutes
Cook Time 30 minutes
Cuisine American, European, Native American
Servings 6
Equipment
  • Pressure cooker (optional)
Ingredients
  
  • 400g dry white beans eg haricot, cannellini or 2X 400g cans cooked white beans
Base (soffritto)
  • 2 tbsp oil
  • 1 clove garlic
  • 1 red onion
  • 1 small carrot
  • 1 stick celery
Sauce
  • 1 400g tin tomatoes or 4-5 fresh plum tomatoes
  • 2 tbsp vinegar eg apple cider
  • 1-2 tsp brown sugar, agave or maple syrup or stevia
Condiments
  • 2 tsp Korean gochujang or 1tsp Spanish smoky paprika (optional)
  • 1/2 tsp za-atar or any combination of thyme, oregano and marjoram
  • salt to taste
Instructions
 
Dry Beans Without Pressure Cooker
  • If you're using tinned beans skip this step
  • soak the beans in plentiful water 6-8 hours or overnight
  • discard the soaking water and rinse the beans under a running tap
  • cook the beans generously covered with water with a teaspoon of salt for around 1 hour or until tender but not mushy
No-soak Beans In A Pressure Cooker
  • place the beans with 4 times their volume of waterf and teaspoon of salt in the pressure cooker and cook on a low flame at high pressure for around 20 minutes. But please note that the cooking times will depend on the type and also age of your beans. Turn off the flame and allow the pressure to come down gradually to ambient pressure (about 15 minutes)
Make The Sauce
  • scrape the carrot and celery stick, or peel using a vegetable peeler, then chop very finely
  • finely chop the onion and garlic
  • saute all the above in a pan with a little oil. When the mixture is well covered in oil pop a lid on and cook until very soft (this can take 15-20 minutes). Avoid browning by adding a large pinch of salt and an occasional small splash of water
  • Cut fresh tomatoes in quarters and liquidze in a blender. Chop whole tinned tomatoes
  • add the tomatoes, za'atar herb mix and gochujang or paprika
  • Add the "sugar" and vinegar
  • cook the sauce for 10-15 minutes
Purée The Sauce
  • purée in a globlet blender or a hand-held to a very smooth sauce
  • adjust the seasoning, sweetness and acidity to your taste
Stovetop Baked Beans
  • Add in the cooked beans to the sauce and and simmer for 10 minutes, stirring gently so as not to break the beans. Add a little water if the sauce gets too think
Oven Baked Beans
  • put the beans and sauce into an ovenproof dish with a good lid. If you don't have a lid cover the beans with tin foil, sealing it well to retain the steam
  • bake in a medium low oven for one to one and a half hours
Keyword beans, pulses

WAYS TO SERVE YOUR BAKED BEANS

Baked beans take pride of place in a Sunday brunch, though they are just as often eaten at breakfast or for supper. They’re great over a baked potato and, if you’re not a vegan, love a poached egg on top

All beans pair well with grains, the two combining to provide complete protein.

Try your baked beans with wheat or corn tortillas or some crusty wholemeal bread and a vegetable side. Or pair then with rice: simply steamed rice can be served in a separate side bowl, while a rice dish like our Mexican inspired paella will demand a more prominent position, with a nice bowl of beans on the side

Subscribe To Posts

Loading

Subscribe To Posts

Loading
Khaman Dhokla: Fermented Chick-Pea Cake

Khaman Dhokla: Fermented Chick-Pea Cake

Contents

Subscribe To Posts

Loading

Khaman Dhokla

Fermented Savoury Chickpea Cake

I first tried this savory snack in London, UK. A very special area of west London known as Southall, famous for it’s sumptouous Indian textiles (my raison d’etre: I wanted sari material for my home, not person) and the best curries outside of India, possibly in the world (my real excuse)

Dhokla is a savoury snack made from fermented chick pea or yellow-split pea batter steamed into a cake, then garnished with an aromatic oil of mustard seed, curry leaf, dried red chilli and asafoetida, also known as hing

My dhokla was light and airy with lots of body, a marvellous lactic tang, and a rounded sweetness. And it was wonderfully moist, a sharp-sweet fruity sauce of dates and tamarind rounding it off to perfection


This taught me two things :


  1. Indian cuisine is highly regional and to enjoy the best food it’s best to stick to the local fair
  2. Dhokla can be made the instant way with chickpea flour and citric acid without having to wait for an overnight fermentation. The result, though tasty and, with a little effort, moist enough, to my mind simply illustrates the vital importance of making dhokla the proper way

METHOD SUMMARY

You’ll find the step-by-step recipe below. Here’s a summary of the main points of the dish. The spices mentioned are the most commonly used, but you’ll find plenty of variation with just a bit of research, and you’re always free to try your own


  1. chickpeas are soaked overnight then ground to a smooth batter with a drizzle of oil and only just enough water to allow the process of liquidizing
  2. spices can be added: try a pinch of fenugreek (dried leaf or seed), another pinch of hing and a quarter teaspoon of turmeric. A scan teaspoon of sugar, honey or maple syrup encourages fermentation and adds a hint of sweetness
  3. the batter is allowed to ferment for 12-36 hours, depending on the ambient temperature
  4. adding a teaspoon of bicarbonate of soda at the last minute definitely helps the batter to rise and be fluffy
  5. the batter is steamed for 15-25 minutes in a cake tin of your choice, covered with a tea towel to stop water dripping onto your cake
  6. once done splash on some water with your fingers while still hot – this prevents the dhokla from feeling claggy and sticking to the throat
  7. cut the dhokla into squares with a sharp, wetted knive
  8. a tarka (aromatic oil) is prepared by popping black mustard seeds in hot oil, along with half a teaspoon of whole cumin, a pinch of hing, a handful or curry leaves, fresh or dry, and a couple of dry red chillies or some red chilli powder to your taste
  9. the hot tarka is poured over the still hot dhokla
  10. enjoy dhokla warm or cold as a snack or starter with some coconut, date-tamarind or other sweet-cour chutneys: try pommegranite-molasses with agave nectar and grapefruit. Be inventive. Have fun!
Indian khaman dhokla
Khaman dhokla
A steamed savoury fermented-chickpea cake from Gujarat, India
Prep Time 20 minutes
Cook Time 20 minutes
fermentation 1 day
Total Time 1 day 40 minutes
Course any, Appetizer, Side Dish, Snack
Cuisine Gujarati, Indian
Servings 6
Equipment
  • a round or square cake tin
  • a steamer with a well fitting lid
Ingredients
  
Dhokla Batter
  • 1 cup dried chickpeas soaked overnight
  • 1 pinch fenugreek (seed or dried herb)
  • 1 pinch hing (asafoetida)
  • 1/4 tsp turmeric
  • 1 level tsp sugar
  • 1/2 tsp salt
  • 1 tsp bicarbonate of soda (optional)
Tadka (tempered oil)
  • 3-4 tbsp neutral oil with a high smoking point
  • 1 tsp black mustard seeds
  • 1/2 tsp whole cumin
  • 1 pinch hing
  • 1 handful curry leaves (10 - 15)
  • 2 whole red chillies, roughly torn
  • ground chilli powder to taste (optional)
Instructions
 
Batter
  • stir in the turmeric, fenugreek, hing (if using), sugar and salt
  • transfer to a covered non-metal bowl and leave in a warm place for 12-36 hours, depending on the time of year, to ferment
  • The fermented mixture should be quite fluffy and pleasantly sharp to taste
Steaming
  • Prepare a steamer or put a trivet or saucer in a pan with water and bring to the boil
  • Oil a square or round cake tin
  • Add the bicarbonate of soda to the batter and stir lightly so you don;t lose the air (CO2)
  • Put the batter in the cake tin, place in the steamer and cover with a well fitting lid
  • Covering the pan with a teatowel will prevent water from dripping on your dhokla, but this is optional
  • steam on a low flame for about 20 minutes
  • Remove from the steamer and immediately splash on some water. This stops the dhokla from sticking in the throat
Make The Tadhka
  • Heat the oil in a small pan
  • Add the chillies and allow to just darken. Follow with the mustard seeds until they begin to pop, then add the cumin and curry leaves, letting them sizzle for a few seconds. Finally add the hing and extra chilli powder to taste. Remove from the flame immediately
  • sprinkle the hot tadka over the still warm dhokla
  • allow to cool and enjoy with a sweet chutney such as tamarind and date sauce, or coconut-green chilli and corander chutney
Keyword cake, chickpeas, fermented, pro-biotic, pudding, pulses, snack, steamed, vegan

Subscribe To Posts

Loading
Gluten-free Vegan Oat Flour Pancakes

Gluten-free Vegan Oat Flour Pancakes

Contents

Subscribe To Posts

Loading

Oat Flour Pancakes

Gluten-Free And Vegan

As a type 2 diabetic I like to avoid the insulin spike you get from some starchy foods, essentially flooding your bloodstream with glucose to be flushed out (in poorly controlled diabetes) or stored as fat for a rainy day

AKA oat hotcakes, these pancakes are fluffy, light, really quick to make and satisfying. They can be sweet or savoury, or a mixture of the two, depending on what topping or accompaniment you’re planning to use

They’re great at any time of day. I like them for breakfast because they’re so hassle-free to make. I mean, who wants to start the day cooking even before breakfast?!

Glycaemic Index Of Oats

The rate at which starch and other carbohydrates enter your blood stream as glucose is known as the glycaemic index, scaled from 0 – 100 and conveniently divided into three categories.

Foods with a lower glycaemic index are healthier as they release glucose into your blood stream more gradually to keep you feeling full for longer

GLYCAEMIC INDEX
High
Medium
Low
VALUE
70 or above
56 - 69
55 or less

The glycaemic index of unprocessed oats averages 58 putting it at the lower end of the medium category. Compare this with instant porridge oats which have a whopping 83 glycaemic rating!

Closely related to the glycaemic index is the glycaemic load. This is the total amount of carbohydrate you absorb and is related to the quantity of food you eat. I’ll talk about glycaemic load in later posts

Meanwhile check out the glycaemic index and glycaemic load of 100 common foodstuffs according to Harvard Health

Soluble Fibre

Oats are rich in soluble fibre

Soluble fibre binds with water to form a gel which slows down digestion helping to

  • regulate your weight by keeping you full for longer
  • regulate blood sugar (see glycaemic index)
  • reduce LDL (bad) cholesterol to help prevent heart disease

Other Nutritional Details

Oats are rich in protein, low in sugar and fat and have a high fibre content, much of which is soluble (see above)

Half a cup of dry oats provides

  • Manganese: 191% of the RDI
  • Phosphorus: 41% of the RDI
  • Magnesium: 34% of the RDI
  • Copper: 24% of the RDI
  • Iron: 20% of the RDI
  • Zinc: 20% of the RDI
  • Folate: 11% of the RDI
  • Vitamin B1 (thiamin): 39% of the RDI
  • Vitamin B5 (pantothenic acid): 10% of the RDI

At a modest 300 calories

Oat Flour: Buy It Or Make Your own?

This partly depends on where you live. After a lifetime of living in London UK I’ve relocated to a small and very charming Spanish City of 9.5k inhabitants. Not quite a village, but where is Wholefoods or Planet Organic?

Fortunately oats are readily available and of all the non-wheat flours oats are by far the easiest to mill. Just put them in a food mill or coffee grinder and within seconds you’ll have the finished product

Did I say? We’re in Trujillo, Cáceres. Check us out. We’re in Google maps – just about

vegan gluten free oat flour hotcakes
Gluten-Free Oatmeal Hotcakes
Gluten free oatmeal hotcakes great at any time of the day
Prep Time 5 minutes
Cook Time 10 minutes
Course any
Cuisine Worldwide
Equipment
  • any heavy based pan or skillet
Ingredients
  
  • 1 cup oat flour oat flour can be made really easily by milling oats in a coffe or spice grinder for a few seconds
  • 1 small pot yoghurt or keffir dairy or vegan, eg soy or coconut
  • 1 egg (optional)
  • 1/2 tsp salt (optional)
  • 1 tsp sugar of stevia (optional)
  • 1 tsp baking powder
  • milk or water dairy or vegan
Instructions
 
  • mix all the wet ingredients in a bowl
  • incorporate in the oat flour and other dry ingredients to obtain a creamy consistency
  • rest for five minutes. Oats soak a lot of fluid and the mixture becomes much stiffer. Adjust the consistency to a thick pouring cream by adding more liquid or flour
  • add spoonfuls of the batter to a medium hot skillet greased with a little oil or butter
  • after a 2-3 minutes when the top is partially cooked flip them over and cook for a further minute or so
  • serve them warm or at room temperature with your favourite sweet or savoury sides and toppings

Notes

I love these for Sunday brunch with a couple of poached eggs, griddled oyster mushrooms and my homemade "baked" pinto beans with Korean gochujang
Keyword gluten-free, grains, oats, pancakes, vegan option

Subscribe To Posts

Loading
Shiozuke: Cucumber With Kelp

Shiozuke: Cucumber With Kelp

Contents

Subscribe To Posts

Loading

Shiozuke

Salt Pickled Cucumber With Kelp And Chilli

Using salt to preserve food spans millennia. The earliest known records date back to 6000BC in an area around the Nile valley and Mesopotamia known as the fertile cresecent. Japan, however, has turned this process into the artform they call tsukemono

Tsukemono or “pickled thing” in Japan accompanies literally every meal, can be served over a bowl of rice and even forms part of the tea ceremony

The simplest tsukemono is salt pickled (shiozuke) and includes fermented and non-fermented varieties. Vegetables with a high water content such as cucumber are more usually lightly and briefly salted to extract water and concentrate their flavour without fermentation. Harder vegetables such as radishes, carrots and other root vegetables lend themselves well to fermentation

The lacto-fermented plums in the next post will serve as an example of the fermentation of fruit and veg

The principal of fermentation is to

  • use salt (2-10% by total weight) to suppress the “bad” bacteria, while allowing the growth of salt-resistant “good” lactic acid bacteria
  • ensure the fermentation takes place in the absence of oxygen, traditionally done by submerging the vegetables in brine

Basic Methodology

  1. salt can be added directly to the vegetables which are then rested to extract liquid which is used as a brine
  2. or the vegetables are steeped in a 5 – 10% salt : water solution or brine and
  3. in all cases the vegetable must be kept entirely submerged, usually with the help of weights to avoid air contact. Any part of the vegetable exposed to air will grow mould and other harmful micro-organisms and will spoil. You can buy special fermentation weights. I fill a sandwich bag with the same concentration brine, tie it with a strong knot and rest it on top of the veg. Foolproof

Pickling Times

  • 5% brine requires 8 hours pickling and will last for 2-3 days
  • 10% brine requires 5 hours of pickling and will keep closer to a week

Condiments

You can pickle vegetables with or witout extra condiments. This recipe uses kombu (sea kelp) and dried chilli with whole coriander seeds. Kelp is a natural source of umami, or deliciousness in the form of glutamate and related compunds, and is reputedly where MSG was first discovered before being synthesized for mass-production

The flavour combinations are basically limitless: for cucumbers try dill with sumak, or preserved lemon with black pepper. Experiment. Be bold!

tsukemono: salt pickled cucumber
Salted Cucumber With Kelp And Chilli
Prep Time 5 minutes
Course any
Cuisine Japanese
Ingredients
  
  • 1 cucumber thickly sliced
  • 1/2 tsp non-iodized salt
  • a few thin strips of kombu (dried sea kelp)
  • a few thin strips of dried chilli
  • 1 tsp whole coriander seeds
Instructions
 
  • put the sliced cucumber in a bowl with the salt and toss with your fingers to disperse the salt evenly. Add the coriander, kombu and chilli.
  • rest, covered at least an hour and preferably 5 hours in the regrigerator. Set a timer so you don;t end up with overly salty vegetables
  • VERY briefly rinse off the salt and use a clean tea towel or absorbent paper to absorb the excess water
  • serve in a clean bowl with the kelp and chilli. Try garnishing with a few black sesame seeds
Keyword pickles, raw-food, salt pickle, tsukemono, vegan

Subscribe To Posts

Loading
Delicious And Nutritious Fermented Plums

Delicious And Nutritious Fermented Plums

Contents

Subscribe To Posts

Loading

Fermented Plums: Powerhouse Of Flavour And Nutrition

The art of fermenting plums and other fruits has captivated taste buds and nourished bodies from ancient times to the modern age. Packed with probiotics, vitamins, and antioxidants, and delivering a tangy – fruity hit, these lacto- fermented treats are a nutritional powerhouse with a unique flavour profile.

As well as enhancing flavour by releasing umami, the delicious fifth taste, the process of fermentation provides the body with health promoting bacteria to help increase the bioavailability of nutrients, making them easier to digest and absorb, as well as supporting digestive, immune and mental health

Whether enjoyed as a healthy snack or used as a condiment in recipes sweet and savoury, these tangy treats offer a burst of flavor to enhance any dish, tantalizing your taste buds while supporting your wellbeing

Science Of Fermentation

Fermentation is a natural process that occurs when microorganisms, such as bacteria or yeast, convert sugars into acids or alcohol. In the case of fermented plums, lactic acid producing bacteria are responsible for the transformation. These bacteria break down the sugars present in plums, releasing lactic acid and other compounds that give the fermented fruit its distinct tangy flavor and health-promoting properties

Lactic acid is a natural product resulting from the partial breakdown of sugars in the body. Lactic acid is an intermediate product in the process of energy production in the body, notably when there is insufficient oxygen to fully break down sugar, such as during high intensity, anaerobic exercise. It can be further broken down into carbon dioxide and water in the presence of oxygen to release more energy

The fermentation process not only alters the taste of plums but also enhances their nutritional profile

Lactic acid is a good source of food for your friendly gut bacteria. Moreover, these beneficial microorganisms present in fermented plums produce enzymes that break down complex nutrients into simpler forms, making them easier for the body to absorb. Fermentation increases the availability of many nutrients, including the vitamins A and C naturally present in the plums, contributing to your daily intake of these essential nutrients

The Process Of Lacto Fermentation

Lacto-fermentation is the natural process of selectively enhacing the growth of lacto-bacilli, the species of bacteria which turn sugars into lactic acid

Since most fruit and vegetables naturally contain lacto-bacteria, all you need to do is to provide the conditions for these to proliferate in preference to other potentially harmful bugs. Two simple conditions must be met:

  1. provide a 2-10% concentration of salt
  2. create an oxygen-free environment

Lacto-Bacteria Are Salt Resistant

While salt kills most bugs our friendly lacto-bacilli don’t mind a bit of salt, though they do mind a lot of it. The minimum salinity to suppress unwanted bacteria is 2% by weight. Although lactobacilli can technically function in an environment of anything up to 10% salinity, they fully thrive at between two and seven per cent salt concentration.
An environment higher than 10%  in salt will suppress all microbial activity and lead to a curing process, a delicious way of preserving food outside the scope of this article

Lacto-Bacteria Are Anaerobic

Lactofermentation will only take place in anaerobic (no air) conditions. If your fruit or veg are directly exposed to oxygen they will soon develop mould and harmful bacteria which will spoil the whole batch

 There are a few commonly-used methods for preventing air exposure

  • Direct salting draws out water to create a brine in which you must keep your fruit fully immersed, usually with the help of a weight – sliced sauerkraut is usually made this way
  • Or you can mix a brine in which to immerse your veg – this is the method used for fermented whole cabbages, the leaves of which are used to make the Turkish stuffed-cabbage dish Sarma. Preserved lemons are commonly also made this way
  • Large pieces of fruit such as plums are rather more difficult to keep submerged and do very well fermented inside a vacum-seal bag. These are easily available and guarantee a scrupulously anaerobic environment.
  • The vacuum-seal technique is the product of René Redzepi, head chef of the Michelin starred Noma restaurants. When fermenting plums this is, for me, the method of choice

Health Benefits of lacto-Fermentation

Fermented plums come with a wide range of health benefits. Lacto fermentation increases the bioavailability of nutrients, making them more easily absorbed by the body. In addition, lacto-fermented food is rich in probiotics, live heath-promoting bacteria essential for a healthy gut.

Science is becoming increasingly aware of the importance of healthy gut bacteria for your overall well-being. Aside from supporting digestive function the gut microbiome provides essential support to your nervous, immune and other regulatory systems. Variety of species is now understood to be a crucial factor, a microbiome rich in different microbial species being associated with concrete health benefits

By supporting the function of the nervous and immune systems, the gut microbiata helps your body fight infection and optimize essential processes including inflammation, appetite, mood, sleep and cognitive function

Antioxidants in fermented plums further help combat oxidative stress and inflammation, reducing the risk of chronic diseases.

The combination of health benefits and taste will make fermented plums a nutritious as well as delicious addition to your diet

How To Ferment Plums At Home

Making your own fermented plums at home is a rewarding and straightforward process. Apply the two golden rules of salt and no oxygen and you’re good to go

There are a few different methods, two of which I’ll share here. The first is brine fermentation in a glass jar or earthenware fermentation crock. This is the old fashioned method requiring no specialist equipment. The second is the “Noma” method, named after the Michelin starred restaurant’s head chef René Redzepi. This method uses halved and stoned plums with 2% salt in a vacuum-seal bag and produces a wonderful, though small quantity of plum vinegar. Make your choice, and let’s go

To start, you will need ripe plums, salt, and a clean, airtight container. Begin by washing the plums thoroughly and removing any stems or blemishes. Next, make a saltwater brine by dissolving salt in water. Place the plums in the container and pour the brine over them until they are fully submerged. Close the container tightly and let it sit at room temperature for several days to allow the fermentation process to take place. Once the plums reach the desired level of fermentation, transfer them to the refrigerator to slow down the fermentation process.

Lacto Plums 1: Brine Fermentation

Unless you want to end up with a plum paste or vinegar (both delicious, by the way) your plums won’t take kindly to being squashed together to exclude air. Japanese omeboshi “plums” (they’re apricots really) are entirely steeped in crystal salt (traditionally 20% by weight of fruit) to produce a product that’s rather more cured than fermented

One way to keep the salt content lower is to use brine. 

1: Start by sterilizing your jar or crock and a second container where you’ll be mixing your brine

Wash the jar and lid / cover and any other utensils you’ll be using in soapy water.  Rinse thoroughly and allow to dry naturally. Don’t use a cloth or even paper towel. Just leave them util they’re dry. You can speed up the process by placing the items on a sunny window-sill or in the oven set to the lowest temperature. Alternatively sterilize your equipment by wiping all surfaces with pure ethyl alcohol or vodka

2: Prepare the brine.

We’re going to make a 2-3% brine. The percentage is relative to the combined weight of the fruit and water. Here’s how I do it:

Weigh a large empty jar or fermentation crock. Fill the jar with washed plums and add enough water to cover the plums by about an inch (2.5cm). Subtract the weight of the empty jar from that of the full jar and you have the weight of the contents. Actually I have electronic scales which will parse or zero the weight. In this case, put the jar on the scales, zero, then proceed as above

Weigh out the salt to 2-3% of the combined weight of fruit and water
Pour the water out into a pan, heat till boiling then add the salt, mixing well to dissolve. Allow the brine to cool completely before returning to the crock

Keep the plums submerged with a fermentation weight. Alternatively fill a plastic sandwich bag with water or brine, tie it closed with a good strong knot and sit it on top of the plums

Close the container tightly and let it sit at room temperature for 7-8 days to allow the fermentation process to take place. Once you see bubbles forming you’ll need to take off the lid daily to “burp” out the resultant carbon dioxide. When the plums reach a level of fermentation agreeable to your palate, transfer them to the refrigerator to slow down the fermentation process and enjoy them within a month

Lacto Plums 2: Vacuum-Bag Method

This second, “Noma” method gives you complete control of the fermentation process. The recipe uses halved stoned plums which release a delectable sweet-salt-sour vinegar with a non end of uses. I’ve been tempted more than once to down the lot in a shot-glass before breakfast. Delicious!

lacto fermented plums in a vacuum bag
Lacto-Fermented Plums Recipe
Vacuum-seal bags provide an oxygen-free environment for lacto-bacilli to thrive for a clean and speedy fermentation
Prep Time 20 minutes
Cook Time 5 minutes
Fermentation time: +/- 5 days
Ingredients
  
  • 1 kg plums washed, halved and stoned
  • 20 g non iodized sea-salt
Instructions
 
  • use a fresh vacu-seal bag
preparing the fruit
  • wash the plums under running water, cut in half and stone
  • in a bowl toss the plums with the salt to cover evenly
vacu-seal bag
  • place in a vacuum seal bag, spaced apart by a couple of inches
  • remove all the air with a pump
  • leave in a warm place to ferment. Depending on the temperature, this will take anything from 5 days to over a week
  • when the fermentation is underway the bag will fill with CO2 gas: burp the bag by opening, resealing and pumping out all the air once again
  • from this point on, taste a small portion of the fruit until it reaches a balance of sweet-fuitiness and sourness to your taste
  • recipes and ideas for using fresh and dried lacto plums and their skins follw
Fermentation times
  • At 25-28C this can take around 5 days. Fermentation at higher temperatures is quicker but gives a rather more acrid result. Generally, the slower the fermentation the better the taste
  • As usual the degree of fermentation depends on your taste. I like them sharp but retaining some fruity sweetness. Let your tongue make the decision
storage
  • the plums and their vinegar will continue to ferment. To slow this down:
  • store the fresh lacto-plums in their vinegar in the refrigerator for a month to 6 weeks
  • or sun-dry for 3 days and store without the vinegar in a jar or plastic wrapper. They will stay good potentially indefinitely without refrigertion
  • the vinegar can be stored seperately, preferably refrigerated
  • the skins can be removed and sun or oven dried until crisp, then flaked or powdered to be added as a garnish to raw salads and cooked dishes
  • recipes and ideas for using fresh and dried lacto-plums, as well the vinegar and skins follow later
Keyword lacto-fermentation, pickles, pro-biotic, raw-food, sides, tsukemono, vegan

Subscribe To Posts

Loading
Roasted Tomato And Garlic Soup

Roasted Tomato And Garlic Soup

Contents

Subscribe To Posts

Loading

Roasted Tomato Garlic Soup

With Sautéed Figs – And Goat’s Cheese?

Too late to make it to the supermarket yesterday I woke to just enough milk for coffee and no bread. Oat porridge, then, with rich, thick soya cream for Sunday breakfast: veganly delicious! StillI I thought I’d better try to make the 2pm deadline for the corner shop for emergency supplies. Little bags of green thingummies in the fridge were figs. Eyeing big, ripe beef tomatoes out of the corner of one eye lunch was sorted

I’m not overly attached to eating things in season. We humans have come a long way in farming since our hunter-gatherer days, and I’m OK with that. Still, I have to admit that things taste best when in season, and figs and beef tomatoes are in season here in Extremadura. As are cherries. Paprika, mercifully, is a condiment for all seasons.

Spanish tomato soup is served with figs and slices of toasted or fried stale bread. I skipped the latter in favour of using up left-over buckwheat risotto in a frittata. Some crisp endives over rocket and a bowl of Jerte cherries rounded off the meal

Roasting Tomatoes

There many ways to skin a tomato: the most straight-forward is under a hot grill. you want the skin quite charred, but the fruit still firm. Roasting by this method cooks the tomato quite a bit, so no need to sweat them: jump straight to peeling them once they’ve cooled down enough to handle and proceed accordingly

Roasting over a flame or charcoal gives the best flavour. I have a wok-shaped pan full of holes especially for the job. I love it, and wholeheartedly recommend it. Flame roasting requires a period of sweating to cook the fuit and let the charred aromas of the skin penetrate the flesh. !5 minutes is minimum. Longer is better

The tomatoes as well as the garlic can also be blackened on a hot skillet. You’ll need to stick around to turn them over frequently, though.

 If you don’t have all day you can just skip the roasting: plunge your tommies in hot water for 30 seconds, peel them and proceed accordingly. But you will be missing a whole dimension of flavour

Roasted Tomato & Garlic Soup With Sautéed Figs
Prep Time 15 minutes
Cook Time 30 minutes
Roasting & resting tomatoes 30 minutes
Course any
Cuisine Mediterranean, spanish
Ingredients
  
  • vegetable stock or a (good) stock cube
  • 2-3 ripe beef or plum tomatoes
  • 4 cloves garlic
  • 1 medium onion
  • a splash of olive oil
  • 1/2 tsp smoked paprika
  • 1 sprig rosemary
  • 2-3 sprigs thyme
  • 3-4 ripe figs
  • a knob of butter
  • fresh goat's cheese (optional)
Instructions
 
  • Start your vegetable stock by adding whatever veg you have to hand with a handful of herbs and spices to a pan.
    I made this one with carrots, white turnips, leeks, a stick of celery and a bunch of parsley (leaves and stems) plus a large pinch of fennel seeds
  • Boil then simmer for 20 minutes. Strain off the solids and keep back the stock
  • Meanwhile roast the tomatoes whole or halved if they're very large, and garlic, skin-on in a very hot oven or grill, on a skillet or over a naked flame (see notes above)
  • When the garlic and tomato skins are blackened wrap them in a kitchen towel over foil or plastic film and let them sweat for 20-30 minutes
  • Slice the onion and soften in a little olive oil with the finely chopped rosemary and the thyme. Adding a little salt stops then over-browning, as does a splash of water
  • Skin the sweated tomatoes and garlic. Slice the tomatoes thickly and the garlic very thinly. Add them to the onions, along with the paprika and cook for 5-10 minutes or until softened through
  • Add the tomatoes and other ingredients to the stock, or vice versa, season with salt and black pepper to taste, bring to the boil and simmer for 15-20 minutes
  • Top and tail the figs and cut them in 4 or 6, depending on their size, and sautée in a little butter - or olive oil to keep the dish vegan
  • Serve the soup in wide soup bowls topped with sautéed figs.
    Traditionally some toasted or shallow-fried slices of yesterday's bread are added.
    I prefer a couple of medallions or soft goats' cheese or a dollop of thick soya cream and a few chopped chives with fresh crusty wholemeal bread on the side
Keyword broth, figs, soup, stock, tomatoes

Subscribe To Posts

Loading
Pasta, Caccio E Pepe

Pasta, Caccio E Pepe

Contents

Subscribe To Posts

Loading

Pasta, Caccio e Pepe

Pasta With Cheese And Black Pepper

I’m not a fan of eating large amounts of pasta on a regular basis. When in Italy – I’ve lived and traveled mainly in the north – I get served pasta in quite modest amounts as a separate course before the main. Maybe it’s different down south, but I think this is the healthier way to enjoy a bit of pasta now and then

If you think pasta with cheese and pepper doesn’t sound like anything to write home about, well, I’m happy to tell you that on this occasion you’d be wrong

One of the great features of Italian gastronomy is sophistication of technique within relative, sometimes great, simplicity of ingredients. This dish, from Rome’s Lazio region illustrates this perfectly

I’ve seen recipes adding grated cheese and a bit of pepper to a plate of cooked pasta, with predictably rather dry and uninspiring results. Others try to cheat with cream for that unctuousness. Really? No!

Caccio E Pepe is a simple marriage of cheese and pepper with very lightly salted pasta water turned creamy, velvety emulsion with rapture inducing results (if you’re into that kind of thing). Like its close relative Pasta Al Aglio, Olio E Peperoncino (pasta with garlic, oil and chilli) it’s devilishly tricky to achieve perfection, but not so hard to get decent results, as long as you understand the technique. The secret to creating that perfect EMULSION is to let your hands work briskly while you yourself remain cool (anyone for yoga?)

Technique Tutorial Summary

The pepper is just lightly crushed with a pestle, then delicately dry-roasted to release its perfume

Being a Roman dish, Pecorino is the cheese of choice, though you’ll get great results with Parmesan or any hard aged ewes’ or cow’s cheese. To the fairly salty cheese you’ll be adding a little of the “glutinous”, salty pasta water. This requires that you use

  1. half the usual amount of salt in the pasta water
  2. half the recommended amount of water to get that glutinous consistency

First time I made this I used too little water for the pasta and ended up with a delicious, but rather sticky result. Thus, I took to keeping a small saucepan of simmering water nearby, ready to come to the rescue. I rarely need it nowadays, but it helps me feel secure

The pepper is coarsely cracked in a mortar and pestle and dry toasted in a frying pan at medium heat until you can smell the aroma

Start cooking your pasta, and once the water starts to look gloopy, add a ladleful to the black pepper in its separate pan (this is where the magic will happen in the final  stage)

Put half of the cheese in a medium size bowl. A couple of minutes of lively bubbling later, add the pepper water to the cheese bowl, whisking vigorously to dissolve it into a thin creamy emulsion, then add the remaining cheese gradually while the mixture is still hot, whisking to create a thicker cream

The pasta is allowed to just 3/4 cook before being finished off in the secondary shallow pan along with a ladleful or two of pasta water and sautéed (tossed) while incorporating the caccio-pepe emulsion in stages until cooked to al dente in its velvety nectar

Have your table very close by and your guests ready to tuck in. This dish waits for no-one

Let’s cook!

Pasta, Caccio E Pepe
Pasta with cheese and black pepper from Italy's Lazio region. Two ingredients, one big dish
Prep Time 15 minutes
cheese grating time 5 minutes
Total Time 20 minutes
Course any
Cuisine Italian, Mediterranean
Ingredients
  
  • 1/2 -3/4 pounds tornarelli, spaghetti or macaroni I always use wholemeal
  • 1 cup freshly grated pecorino or parmigiano or your favourite aged HARD cheese
  • 15 black peppercorns
  • salt
Instructions
 
grate the cheese
  • divide your grated cheese between two bowls
cook the pasta
  • follow the instructions on the packet using half the recommended amounts of salt and water
  • optionally boil some water in a small pan and have it simmering in case you run out of pasta water!
  • Cook the pasta till al dente but still a bit hard: you'll be stealing about 3-4 minutes from the recommended cooking time
prepare the pepper
  • while the pasta is cooking coarly crush the whole peppercorns in a mortar and pestle
  • when the pasta water starts to look gloopy put the crushed peppercorns in a dry large frying pan and toast on medium heat for a few seconds to just release the aromas
  • add a ladleful of pasta water to the pepper and cook on high heat for 2 minutes. This will release the pepper's aromatic oils into the water
emulsify the cheese, pepper and water
  • add the hot peppered water to half the cheese in a bowl, stirring vigiriusly to achieve a thin cream. While still hot add the relmaining cheese. If the resulting cream is too thick add spme more of the pasta water to achieve the consistency of thick double cream
finish the dish
  • transfer the pasta to the frying pan you used for the pepper along with a couple of ladle-fuls of pasta water
  • add the cheese-pepper emulsion in 3-4 stages, tossing the pasta contiuouslty. Add more pasta water to thin out if necessary and cook for 2-3 minutes until the pasta is cooked al dente and the emulsion is creamy and smooth. If if looks over sticky add a tiny bit more water, but careful!
  • Serve immediately
Keyword cheese, ova-lacto, pasta

Subscribe To Posts

Loading
Sweet Potato, Broad Bean & Feta Tortilla

Sweet Potato, Broad Bean & Feta Tortilla

Contents

Subscribe To Posts

Loading

Sweet Potato And Broad Bean Tortilla

With Greek Feta Cheese

What distinguishes italian frittata from Spanish tortilla? The distinction is not a culinary but a historical one. The “open-faced” omelette most likely originated in Persia. It travelled to Spain where, with the addition of potatoes fresh off the boat from the new world became the tortilla, thence to France, Italy and yonder for omelettes, frittatas and whatever else

Sweet Potatoes Are Not Potatoes!

Ipomea Batatas is a tuber related to Morning Glory, not to the nightshades, and therefore not to the potato, though the two have an extremely old common ancestor. Ipomea Batatas has several important properties:

Nutritional Notes

Despite their sweet taste, sweet potatoes have a lower glycaemic index than the white potato making it more suitable for people with type 2 diabetes

That said, the glycaemic index is still high ranging from 44 (medium category) to 94, definitely in the high group. Boiling reduces the index, while baking increases it. Worth bearing in mind

Though containing mainly starch, around 11% of this is resistant starch, broken down slowly to reduce the rate of entry into the blood-stream (the glycaemic index) and also feed you beneficial gut bacteria. Cooling after cooking, increases the resistant starch content. You’ll need to cool it down to 4C or even lower. And reheating increases resistance yet again!

Sweet potatoes also contain high levels of beta-carotene which your body can convert to vitamin A, as well as decent amounts of vitamin C and many essential minerals

It’s worth mentioning that they also contain high levels of oxalyc acid, which may exacerbate the formation of kidney stones if you’re susceptible

GLYCAEMIC INDEX
High
Medium
Low
VALUE
70 or above
56 - 69
55 or less

Notes For Making A Good Tortilla

The tortilla is very forgiving and lends itself well to variations in texture and thickness depending on your taste

That said, here are my recommendations for enjoying and excellent tortilla

The classic Spanish tortilla is rather thinner than the ones you find ready-made in shops and served in your typical restaurant. A good tortilla is juicy without being raw. This is much easier to achieve with the thinner variety. It also requires the freshest eggs

If you’re worried about the quality of your eggs, try the float test. Immerse the eggs in a deep bowl of water and check their behaviour. While the float test won’t tell you if your batch is contaminated with Salmonella, it will tell you something about their freshness


these are the freshest eggs
less fresh but safe to eat
eggs are old - discard

Only partially (half-to thirds) cook the contents of the tortilla. Except for the onions, which should be fully softened. Use enough eggs to just cover the contents in the mixing bowl and in the pan

Use a well-seasoned or non-stick pan with enough (olive) oil to cover the entire surface and hot enough for the egg mixture to immediately sizzle and form a base layer

Shake the pan back and forth until the cooked layer egg slides in one piece. You may need to use a spatula to help you. If the pan wasn’t hot enough you’ll have to be patient and wait for that bottom layer to form before you try to unstick the tortilla from the pan. Once you get the whole thing to slide, you’re good to go

For thinner tortillas turn the heat to medium and leave uncovered for a minutes or two before turning. Shake the pan frequently

For thicker tortillas turn the heat down to a minimum and cover with a lid to build up steam 

In either case, turn the tortilla while there is still a bit of raw mixture on top. Use a plate to flip the tortilla, clean the pan as needed with some absorbent paper, add a drizzle of oil, and slide your turned tortilla back into the pan. Tuck in the sides with a silicone or wooden spatula for a neater look

Cook for another minute or two, depending on the thickness, then flip onto a dish to cool slightly. And enjoy

Sweet Potato Tortilla With Broad Beans And Feta Cheese
Prep Time 15 minutes
Cook Time 15 minutes
pre-cooking 10 minutes
Total Time 40 minutes
Course any
Cuisine spanish
Ingredients
  
  • 1 large sweet potato
  • 1 medium opnion
  • 2-3 cloves garlic
  • 1 cup broad beans fresh or frozen
  • 5 eggs
  • large pinch nutmeg
  • mixed herbs of your choice fresh or dried
  • salt and pepper to taste
  • 200 g Feta cheese
  • good oilive oil for frying
Instructions
 
  • Finely chop and soften the onion in a little oil till translucent, about 5 minutes
  • Add in finely chopped garlic and soften for a couple of minutes
  • Peel and wash the sweet potato. cut it in half lengthways and slice each half into 1/2 centimetre slices
  • cook in lightly slated water until tender but still firm
  • cook the beans in water for 7-10 minutes, depending on their size
  • in a large bowl beat the eggs with the chopped herbs and nutmeg
  • add in all the slightly cooled pre-cooked ingredients, mixing thoroughly, and adjust the seasoning to your taste
  • heat some oil in a fying pan and add half the tortilla mixture, shaking the pan to avoid sticking
  • add the crumbled feta and cover with the remaining egg mixture. Keep shaking that pan
  • once you see a fine layer of cooked egg at the base turn the heat down to low. Thicker tortillas will cook through better covered with a lid. Thinner tortillas won't need this and can be turned after as little as 2-3 minutes, depending on how runny you like your eggs
  • To turn just flip it like a pancake, or play safe (highly recommended): place an upside-down plate over the top, flip the pan over and slide the tortilla back in from the plate. Remember the tortilla is very hot, so use a dinner plate which won't burn your hand
  • I have a (well-seasoned) double tortilla pan, readily available in Spain, but believe me, people have been using the plate method successfully for centuries
  • enjoy hot, cold or even warm
Keyword beans, eggs, pulses

Subscribe To Posts

Loading