Spiced Smoked Aubergine Curry – Begun Bharta

Spiced Smoked Aubergine Curry – Begun Bharta

Contents

Subscribe To Posts

Loading

Smoked Aubergine Bharta

The versatile aubergine or eggplant takes pride of place in our kitchen. And having shared one aubergine recipe this excellent vegetable surely deserves a bit more attention before we get side-tracked

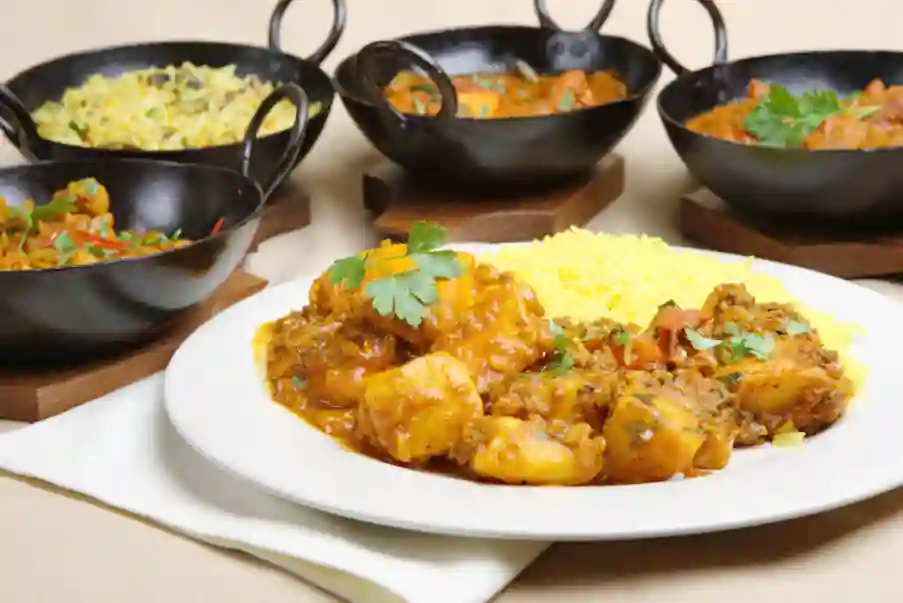
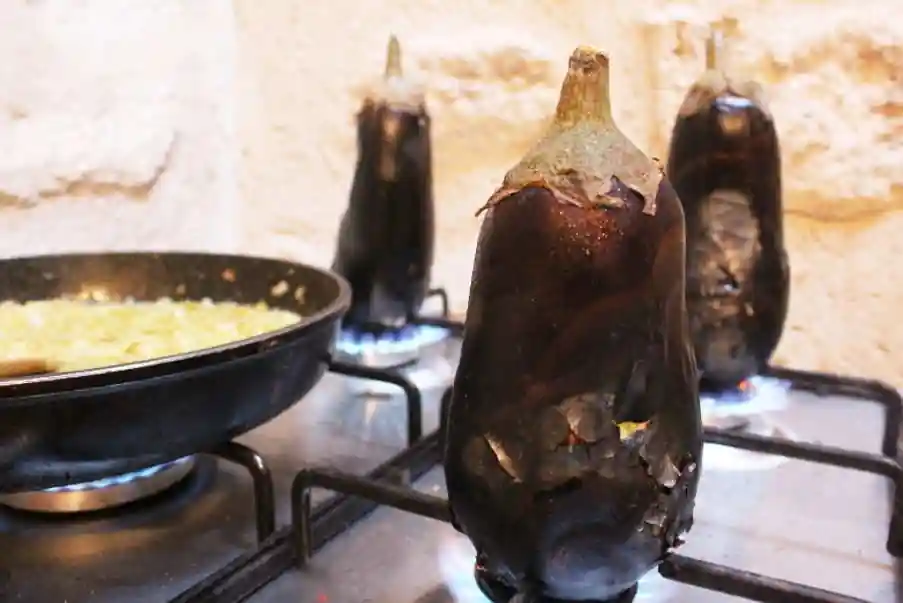
Large plump aubergines are roasted over a naked flame, sweated and scooped from the charred skin. The pulp is then seasoned with long-sautéed onions, garlic, chilli, coriander. a little turmeric and salt

Deeply smoky and creamy began bharta is great warm with flat-breads, a yoghurt cooler and a fresh crunchy salad. Eaten at room temperature it makes a delicious spread for a slice of good crusty bread

This recipe was given to us by our dear friends Shams and Alan on a visit to us in Spain a couple of years back. Cooking curry throughout was the condition for Shams even contemplating a visit. I ate “curry” for breakfast, lunch and dinner while in India, and getting the chance to re-live the experience back in Spain was a pleasure not to be missed

Shams retired from her day job as head pharmacist for Redbridge trust in south-east England to devote herself to cooking.

She’s ubiquitous at festivals, weddings and other events and also runs a private restaurant and cooking school where she teaches Pakistani and Indian cooking.

She and husband Alan also do takeaways. They were vegan when last we met just a few weeks ago in London, but were still cooking chicken for their patrons. Are they still? Check them out at Sham’s kitchen
roasted aubergine curry
Smoked Began Bharta
A creamy flame smoked aubergine dish with onions, chilli and coriander. Simple but deep
Prep Time 15 minutes
Cook Time 30 minutes
Resting time 45 minutes
Total Time 1 hour 30 minutes
Cuisine Indian, Pakistani
Ingredients
  
  • 3 large aubergines
  • 4 large onions
  • 3 cloves  garlic  minced or crushed
  • 2 tsp  ground coriander seed
  • 1/2 tsp  ground turmeric
  • 1 tsp   red chilli powder
  • 1 bunch   fresh coriander  roughly chopped
  • salt to taste
  • 2 tbsp oil I'm afraid I use extra virgin olive oil with everything - but you might prefer a more neutral tasting oil such as rapeseed / canola
Instructions
 
Prepare the aubergines: You can do this in various ways
  • Place the aubergines directly over a gas flame - my personal wont
  • Place over charcoal or a wood fire - for the best taste
  • Put into a very hot oven -
  • Turn the aubergines as necessary to get them evenly charred.
  • Place flame-roasted aubergines in a sandwich bag wrapped in a tea towel, letting them steam until cooked through. 45 minutes minutes is about right for me. The longer you leave them the smokier they'll taste. But be warned, they can taste too smoky and rather bitter if you leave them over-long
  • Simply rest oven-roasted aubergines until they are cool enough to handle
  • Peel away the skin, leaving bits of charred skin here and there and finely chop or mash the flesh with a fork. Set aside
Transform the onions: this stage is crucial to the flavour of the dish
  • While the aubergines are cooling gently sauté the onions in a a couple of tablespoons of any neutral-tasting oil. After 15 minutes add the garlic and a large pinch of salt. Continue cooking for further 10-15 minutes, splashing in a little water as necessary to stop them from burning. This step is crucial to the flavour of the dish. Don't lose patience. The final rich sweetness of the onions will blow your socks off. It really is worth it
  • You're on the home run: stir in the powdered spices and salt and sauté for a minute or two, stirring continuously
  • Add in the chopped aubergines, season with salt and warm through. Sprinkle on some chopped fresh coriander and serve
Keyword aubergine, curry, spice, vegan

Subscribe To Posts

Loading
Authentic South Indian Dosa At Home: Master The Recipe for The Perfect Batter

Authentic South Indian Dosa At Home: Master The Recipe for The Perfect Batter

Contents

Subscribe To Posts

Loading

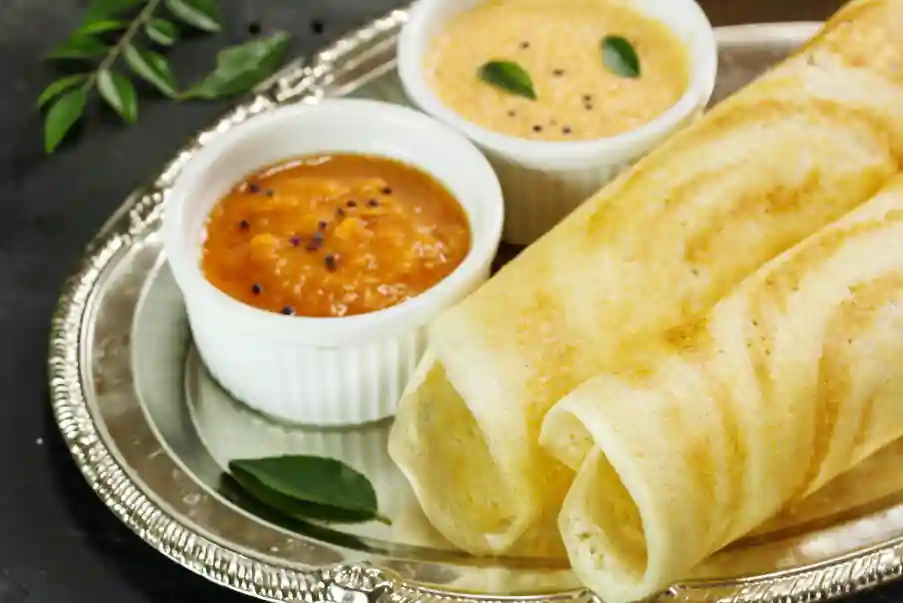
When in London the first thing we do is plan an outing to Sagar, our favourite south Indian eatery, for our fix of the that crispy, light and savoury Indian delight: the Dosa

A flat, crisp pancake resembling a crepe, traditional dosa combines rice with washed black lentils in a batter which is then lacto-fermented to make the resultant pancake not just more digestible, but also bursting with health promoting friendly bacteria

Dosa are traditional to South Indian and Sri Lankan Tamil cuisines but are popular all over India – and beyond. They are a staple in South Indian restaurants in the West. Plain or filled they’re served with coconut chutney and sambar, a hot and sour South Indian vegetable dish flavoured with tamarind and curry leaves.

Dosa are made from a variety of grains and pulses, often fermented as in our urid dal – rice recipe below, sometimes not as in rava dosa made from cream of wheat. There are chickpea flour (besan) dosa, mung bean dosa, red lentil dosa … the list could be endless

We’ll explore some of these later. Now, we start with the basic recipe for rice and washed black lentil (urid dal) dosa


Key Ingredients For The Perfect Dosa Batter

Dosa can be made with a great variety of pulses and grain, sometimes singly, often in combination. The classic white dosa uses a mixture of rice and lentils as follows

1. Rice: Though parboiled and idli rice are widelt recommended for dosa, I can’t get away from Basmati being – well, the best rice in the world. Experimenting aside, why compromise?

2. Urad Dal: Also known as black gram, urad is an essential ingredient. Dosa batter is made from wahsed urad dal which, far being black, is actually creamy white. The lentil makes for a creamy texture and helps with fermentation.

3. Fenugreek Seeds: Adding a pinch of fenugreek of whole or ground seed to your dosa batter will enhance the flavor, and reputedly also aids in the fermentation process. I haven’t checked the science, but I definitely include it for the taste

 4. The fourth ingredient, lactic acid is produced naturally as you rest your batter in a warm place to soak up the fifth ingredient …

5. Your friendly lacto-bacilli (bacteria) from the air


Preparing The Dosa Batter

1. Soaking the rice and lentils: Rinse the rice and lentils thoroughly and soak them in plenty of water in separate bowls for at least 4 hours, and preferably overnight. Soaking helps in softening the grains and initiates the fermentation process.

2. Grinding the batter: Once the rice and lentils are soaked, drain the water and transfer them to a blender. Add a pinch of fenugreek if you like, plus the least amount of water to be able to grind the mixture until it forms a smooth, thick, creamy batter. 

3. Fermentation: Transfer the batter to a large bowl and cover it with a clean cloth or lid. Allow the batter to ferment for 8-12 hours or overnight, depending on the weather conditions. Fermentation is a crucial step as it helps in developing the characteristic tangy flavor of dosas and makes them light and fluffy

4. Seasoning the batter: Once the batter has fermented, add salt to taste and mix well. The batter is now ready to be used for making dosas. You can store the leftover batter in the refrigerator for up to 2-3 days.

Tips for Fermenting the Dosa Batter

Fermentation plays a vital role in the taste and texture of dosas. Here are some tips to ensure successful fermentation:

1. Temperature control: The ideal temperature for fermenting dosa batter is around 80-90°F (27-32°C). If the weather is cold, you may be forced to keep one room nice and toasty for the sake of the fermentation process. Here in Spain, bread and other ferments are placed “a flor de fuego”: by the fire’s bloom. Simply light a good fire and be careful not to place your batter too near it!

2. Consistency of the batter: The batter should be slightly thick and not too watery. A thick batter will aid in the fermentation process and result in soft and fluffy dosas.

3. Additives for fermentation: Fenugreek seeds (methi) are traditionally added to the soaked rice and lentils before grinding. Fenugreek seeds appear to act as a natural fermenting agent and help in achieving a good rise. As I said, I haven’t troubled to check the science, as I add fenugreek purely because I like the slightly bitter taste


south indian dosa
Classic Rice & Lentil Dosa
This is a fermented batter made from two parts rice to one part urid dal (washed black lentils). These are easily available from Asian stores in major towns
The fresh batter is first used for making idly, soft fluffy steamed dumplings eaten with sambhar and coconut chutney for breakfast all over India. By the following day the batter can start to look a bit tired and is then turned to dosa
Since idly requires a special idly steamer we cut straight to the dosa - for now. Here it is
5 from 1 vote
Prep Time 20 minutes
per dosa 4 minutes
Total Time 25 minutes
Course Appetizer, Breakfast, lunch, Snack, supper
Cuisine Indian sub-continent, Sri Lankan, street-food
Ingredients
  
  • 1 tea-cup urid dal (washed balck lentil)
  • 2 tea-cups basmati rice
  • 1 tbsp oil
  • 1 pinch salt (optional)
Instructions
 
The Batter
  • rinse the rice and lentils and leave to soak in seperate bowls for 8 hours or overnight
  • the following day add the rice and lentils to an electric blender in batches with enough water to create a batter the consistency of thick cream
  • stir in the oil, cover and leave in the sun or a warm place all day until the batter has fermented and smells yeasty
Season the skillet
  • add a drop of oil to the skillet and coat the entire surface using some paper towel. Now heat the skillet to smoking point until most of the oil has burnt off. Allow the skillet to cool: drop a bit water onto the skillet or run the back of the skillet under a cold tap untill it stops sizzling
  • re-warm the skillet until a drop of water just starts to sizzle. If the pan is too hot you won't be able to spread your dosa
Make Dosa - thin and crispy
  • drop a large spoonfull of batter onto your skillet, then with the back of the spoon spread the batter from the middle outward in a circular, spiralling motion
  • turn the heat up a little and wait for a golden brown colour to start showing throught to the upper uncooked side. The dosa should now come easily away from the skillet with the help of a spatula. If it doesn't leave it to cook a little longer
  • Dosa are cooked on one side only: remove from the skillet, fold in half and serve it to your guests right away with some coconut chutney
  • Place the back of the skillet under a cold tap to cool before making your next dosa
Make Dosa - light and fluffy
  • Drop spoonfuls of batter onto a warm skillet and allow it to spread naturally. Bubbles will form on top giving the dosa a spongy appearance
  • These dosa are smaller than the above and you can make several at a time if you have a large enough pan
  • The dosa is cooked when no more bubbles appear, the top has fully solidified and the base is golden and comes away from the skillet easily
  • Serve as above

Notes

These dosa fulfil the grain-pulse combo for complete protein.
It's likely that in the cooking process some of the fermentation products will be denatured, but the fermentation will help your gut better assimilate the rice and lentils and the taste will be absolutely great
Keyword fermented, indian, pro-biotic, pulses, rice, street-food

Subscribe To Posts

Loading
The Secret To The Great Taste Of The British Restaurant Curry

The Secret To The Great Taste Of The British Restaurant Curry

Contents

Subscribe To Posts

Loading

Is Indian Food Healthy?

I’m noticing a trend towards “healthy” Indian restaurants in London. I’m delighted, of course. The likes of Sonita’s Kitchen , Healthy indian Cooking in London’s Camden Lock certainly deserves every one of its 4.5 Google-stars.

The marketing, however, implies that normal Indian food is less than healthy. But India is a country of half a billion vegetarians. A country where through Ayurveda, India’s ancient healing tradition, ordinary folk are intimately familiar with the medicinal properties of their food. And Indian food is regional and as varied as anything accross any two European countries. No, the trouble is exclusively with the British curry’s heavy-handed use of oil.

The Great “British” Indian Curry

(more…)

Pizza Tamalera: Gluten-Free Maize Crust Pizza

Pizza Tamalera: Gluten-Free Maize Crust Pizza

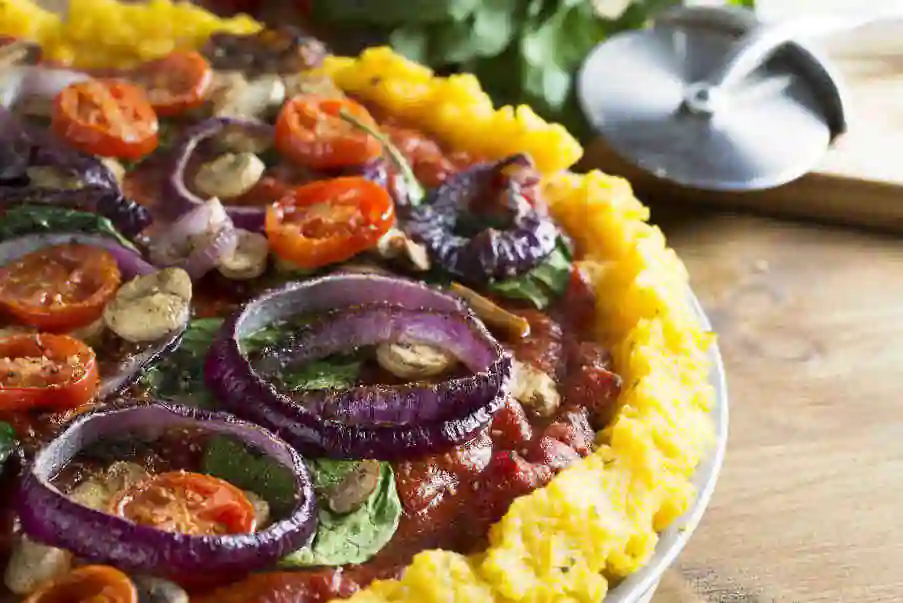
Polenta-based pizza is nothing new. And quite delicious, though many would argue whether it’s a pizza at all. The question seems to me academic. What is not academic is that nixtamal or lime-treated corn is not polenta! Nixtamalized corn has more protein, more vitamins – especially vit B3 (niacin), essentially unavailable in untreated corn – and of course exrtra calcium from the lime. It also has a more intense flavour – the flavour of maize.

Like any pizza, this is an assembled dish requiring pre-prepping of the essential elements:

  1. the base
  2. the sauce, and
  3. the toppings

Choosing any topping of your choice, add cheese (or not) and other protein components or serve the protein in an accompanying dish.

Two previous posts have covered how to make the corn tamal base in two basic ways. For ease, they’re both included in this post so you have all the elements in one place. Feel free to change the sauce, the toppings, even the base – use polenta if you like. It won’t be Mexican. But it’ll be delicious. Have fun!

Pizza Tamalera – Overview

A baked, open Mexican tamal assembled into a gluten-free corn-based pizza

Base

  • 1 lb by dry weight of tamal dough. See recipe(s) below

Tomato Caldillo

  • 1 quantity tomato caldillo (see recipe below)

Pizza Toppings

  • 1 small red onion
  • 6 jalapeño or any large medium-hot chilli (red and green)
  • 1 large courgette (sliced)
  • 2 sweet bell peppers in varying colours (sliced)
  • 12 open or closed-cap mushrooms (sliced)
  • 1 bunch basil leaves

Cheese(?)

  • 1 cup roughly torn cow’s mozarella
  • grated parmesan (or other hard pasta cheese)

Vegan alternatives

  • crushed hazelnuts, slivered almonds, toasted whole hulled pumpkin seeds (use any combination or omit altogether)

Prepare The Tamal Batter-Dough

  1. scroll down or click to open the post

Make The Caldillo Tomato Sauce

  1. scroll down or click to open the posts for Veggie Stock & Caldillo Sauce
  2. Once your tamal dough has passed the float test (see post) and has been duly refrigerated (see recipe below) spread it to your taste over two cake or flan tins. Round tins will give your wedges and square ones will give – well, squares.
  3. Brush with a little oil and oven-bake at 180C for 15 minutes

Assemble & Cook The Pizza

  1. Spread a fairly generous layer of the caldillo tomato sauce to within 1cm from the edges of the pre-cooked pizza bases
  2. Share your prepared vegetable toppings between the two pizzas, then season with salt and pepper, sprinkle on the basil leaves, then parmesan and finally the mozarella (hard cheeses such as Halloumi also work well here, grated or thinly sliced)
  3. Bake for a further 5-10 minutes at 180 degreesC and serve immediately with a fresh, crispy salad

While nothing compares to nixtamal, there is no doubt polenta is easier to source and quicker to prepare

Cook the polenta according the instructions on the packet. Spread it, still hot, on your cake tin, then cool, cover and refrigerate for at least an hour and preferrably overnight. Bake and finish off your pizza as per the recipes below

Tamal Base 1

masa para tamales
Tamal Dough - From Masa Harina (Instant Nixtamal)
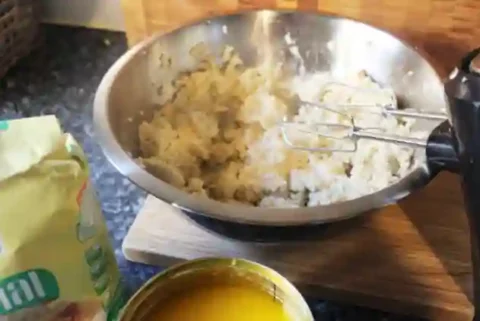
Masa Harina For Tamales has been treated with lime and ground to the right consistency for the best texture. The basic tamal batter or dough requires the addition of liquid, usually stock, and shortening with plenty of beating either by hand or electric mixer to add air for a light, fluffy finish.
Prep Time 15 minutes
Total Time 15 minutes
Cuisine Latin American, Mexican
Servings 12 tamales
Ingredients
  
  • 1 lb by dry weight of Masa Harina Para Tamales
  • 1/2 cup oil, vegetable shortening, butter or ghee or use half this quantity and add bicarb or baking powder
  • 1/2-1 level tsp bicarbonate of soda or baking powder (optional)
  • 1/2 litre vegetable stock or water
  • salt to taste
Instructions
 
  • Put the masa into a mixer bowl. Add all of the shortening (oil, vegetable shortening, etc.) to the dry masa now. Starting at low speed add about 1/3 of the the liquid. When this is incorporated turn up the speed to medium-high and add the remaining liquid, a little at a time, whisking for a good 5 minutes in total
  • The mixture shouuld resemble thick cake batter but be easily spreadable
Float test
  • Let your mixture rest for 15 minutes in the fridge, then drop a little into a cup of water. Your batter should float. If it doesn't, add a little more liquid and fat,  whisk for a further 2-3 minutes and refrigerate for aother 5-10 minutes before repeating the float test
Reduced fat version
  • Reduce the quantity of fat by 1/4 to 1/3. Try the float test. If necessary add in your raising agent(s), whisking briefly. Keep any mixing and stirring brief and light from this moment on to avoid beating out the air. After 10-15 minutes in the refrigerator your mixture is ready to use

Tamal Base 2

Basic Dough For Tamales From Corn And Lime
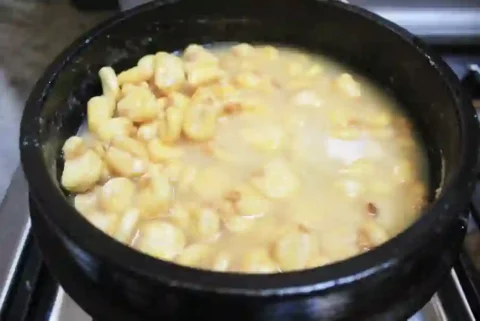
This version starts with the raw ingredients: whole dried maize, limewash and water. Simple!
Cook Time 15 minutes
soaking time 8 minutes
Total Time 10 minutes
Cuisine Latin American, Mexican
Servings 12 tamales
Ingredients
  
Making nixtamal
  • 1 lb by dry weight of whole dried corn white, blue, yellow or other
  • 1 tbsp pure slaked-lime putty
  • water to cover
making tamal dough
  • prepared whole nixtamalized maize (as above)
  • 1/2 cup oil, vegetable shortening, butter or ghee or use less and add bicarb or baking powder
  • 1/2 - 1 tsp bicarbonate of soda or baking powder (use in the reduced-fat version)
  • 1/2 litre vegetable stock or water
  • salt to taste
Instructions
 
Nixtamalizing The Corn
  • Put the whole dried maize kernels in a pan and add enough water to cover
  • Dissolve a tablespoon of slaked lime (calcium hydroxide, cal, limewash) in a little water and add to the pan
  • Bring  the pan to the boil and simmer the corn for about 15 minutes. Transfer to a non-metallic container and leave to soak, covered, overnight
  • In the morning rinse the corn thoroughly until the water runs clear
Making the tamal dough
  • Put all of the nixtamalized corn in a food processor. Add a quater of the liquid and grind using the main blade starting at low speed and gradually speeding up to high
  • Gradually dd the fat and remaining stock, alternating in batches to obtain a atill slightly grainy texture similar to a stiff cake dough or peanut butter
The float test
  • Put a small blob of dough into a cup of water. If it floats the tamal dough is ready. Otherwise add a little more fat and liquid (water if you've run out of stock).
  • If you're making the reduced-fat version add the raising agent (bicarb or baking powder) now and briefly pulse the dough in the food processor just enough to mix it in, or turn the dough out into a bowl and gently stir it in by hand
  • Chill the tamal dough for 20-30 minutes before going on to make your tamales. Chilling the tamal dough significanltly increases the chances of your dough passing the float test.

Latin American, Mexican

The Sauce

mexican tomato caldillo sauce
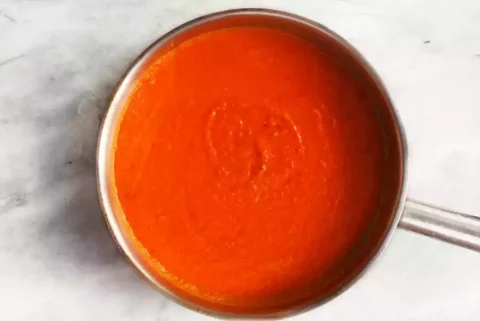
Mexican Caldillo Tomato Sauce
A versatile tomato sauce with chipotle chile, corainder and a whole pot of vegetable broth. The soul of this sauce is the stock, so give your all for the best stock ever created (click here for our guidelines)
Prep Time 15 minutes
Cook Time 30 minutes
Total Time 45 minutes
Cuisine Mexican
Ingredients
  
  • a generous glug of good olive oil or any oil with a high smoking point
  • 1 white onion finely chopped
  • 2 cloves garlic finely chopped
  • 1 kg tomatoes, skinned and finely chopped or puréed in a food processor or a large jar of passata or even a couple of tins of tomatoes
  • 1-2 chipotles: preferably in adobo, otherwise use dry chipotles softened in a little warm water OR Spanish hot smoked paprika
  • a bunch of corander - leaves, stems and roots
  • 1 litre of your best vegetable stock (keep it simmering in its own pan)
  • seasoning to taste
Instructions
 
  • Start by making a good vegetable stock (click here for guidelines)
  • Heat enough oil to cover a medium, deep fying pan
  • Add the onions and garlic and soften at medium low heat for around 10 minutes
  • Add the chopped or puréed tomatoes and chipotle chillies
  • Sweet or hot smoked Spanish paprika is a reasonable substitute if you want to keep the heat down or if you can;t source chipotles
  • When the tomatoes start to reduce down start adding a couple of ladlefuls of hot stock. Reduce this down, uncovered, and keep adding similar quantities of stock. When you've used up half of your stock-pot add the coriander, season and continue adding stock until it's all used up
  • Use in your favourite dishes

Subscribe To Posts

Loading

Subscribe To Posts

Loading

Vegetarian Masa For Tamales

Vegetarian Masa For Tamales

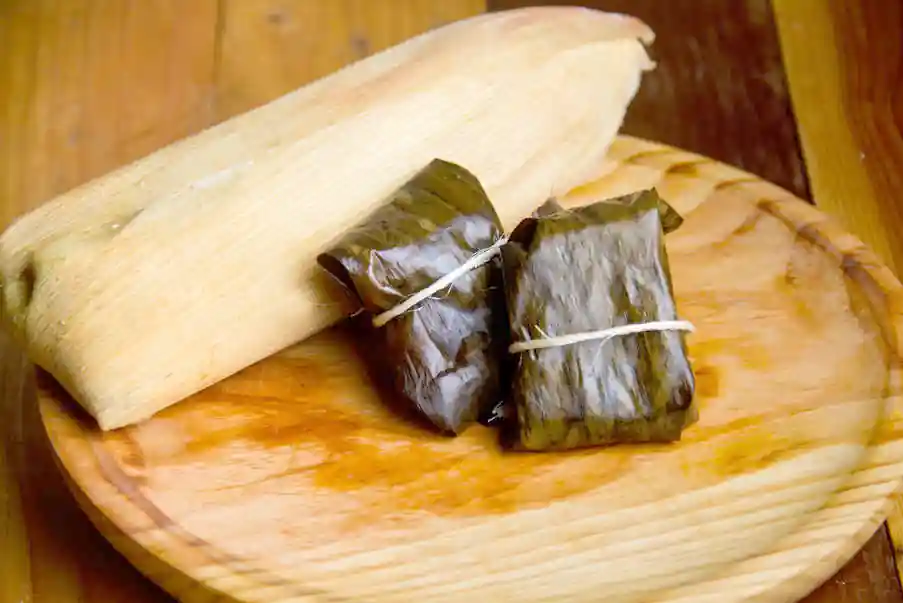
Tamales are corn dumplings, filled with beans and a variety of vegetables, as well as meat, fish, and even insects and their eggs, all wrapped in corn husks, or in more tropical regions plantain or avocado leaves, then cooked in a variety of ways.

There are savoury and sweet tamales, filled and unfilled (blind), open (unwarapped) and closed, steamed, boiled, roasted, fried, even fermented tamales. The range is potentially endless (more…)

Mexican Home Cooking: How To Make Perfectly Refried Black Beans

Mexican Home Cooking: How To Make Perfectly Refried Black Beans

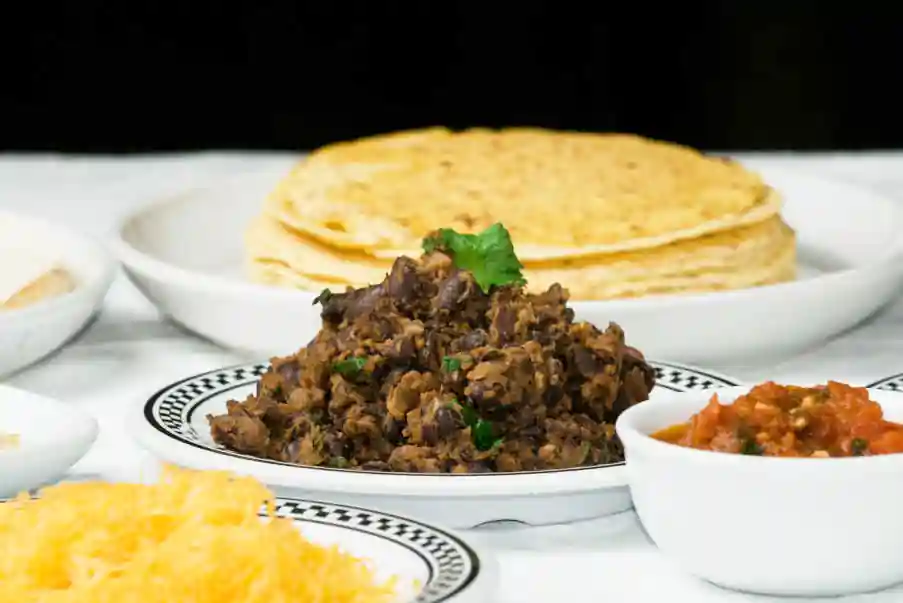
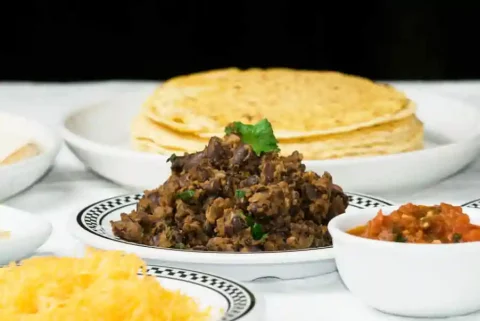
Bring the authentic flavors of Mexican cuisine to your own kitchen with the Mexican classic, refried black beans. Rich in protein, fiber, and essential vitamins and minerals, beans are a staple of Mexican cuisine, and make a healthy addition to any meal

Refried black beans, or “frijoles refritos” in Mexican Spanish, are enormously versatile. Enjoy them with tacos, enchiladas, and tostadas or as a tasty side accompaniment to literally any dish

Scroll down to learn the secrets to preparing perfect refried black beans, and bring the taste of Mexico right on your plate

Why Refry Black Beans?

it’s a given fact that all bean dishes taste better after a day or two from preparing. And Mexican refried beans are no exception. Beans contain lots of protein, and the resting, cooling and reheating processes not only allow the flavours to amalgamate, but also release umami, the fifth primary taste of “deliciousness” derived from free amino acids such as glutamate and guanate

While you can simply add water or broth to yesterday’s beans, the refrying process breaks down the beans to release more umami, as well as further depth and complexity from the oil and all those yummy condiments you get a chance to add. There’s simply no tastier way to enjoy beans!

Making Black Beans For Refrying

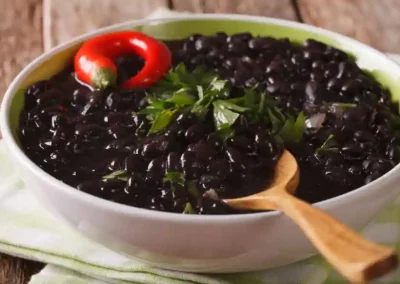
mexican black beans

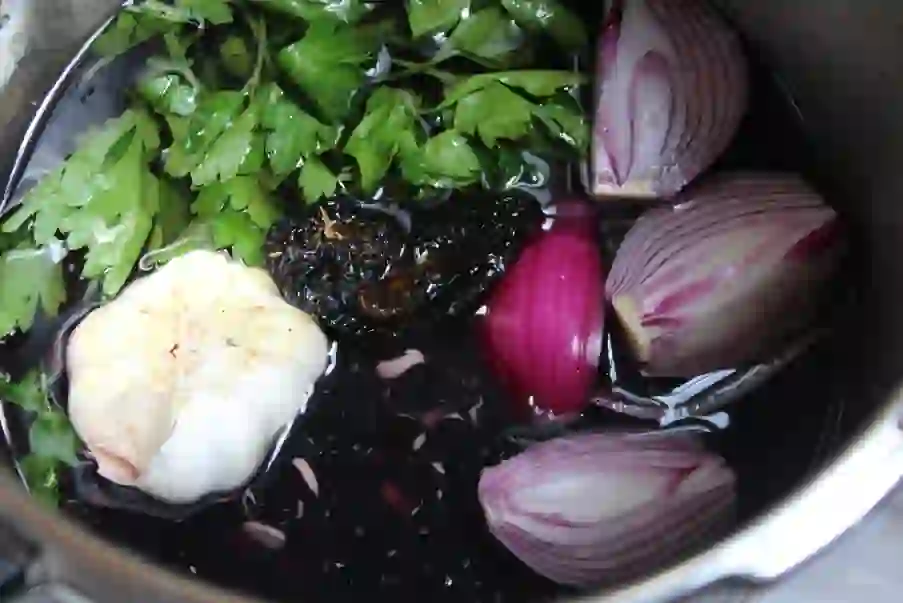
Before refrying black beans you’ll want to start with the raw material: a bean dish to refry. Without doubt, the quality of your refried black beans will depend more than anything on the quality of your base dish. I’ve covered the preparation of Mexican black beans in a seperate post. Take a look now, and come back when you’re ready to refry

Cooking beans at home lets you avoid all those additives present in store-bought options. On the other hand, when time is of the essence it´s great to be able to start from a can or jar of beans or Mexican bean paste. It may not be the best thing going straight out of the can, but you won’t believe the transformation after we’ve finished with it!

Storing And Reheating Beans

First and foremost you’ll want to ensure your beans age gracefully, remaining fresh rather than spoil and needing chucking

Refrigerate cooked beans as soon as they reach room temperature. The following day add a cup-full of broth or water and cook at medium high heat for 10-15 mins. Stir them fairly vigorously to stop the beans sticking. Don´t worry about breaking them up:  it’s all part of the cause for producing great refried beans

Tips For Refrying Black Beans

Once your black beans are cooked, it’s time to transform them into refried black beans. In a large skillet, heat a few tablespoons of oil over medium heat. Add finely chopped onions and sauté until they are soft and translucent. Fresh sweet capsicums can be added now. Let them soften, then add minced garlic and cook for another minute until fragrant

Other spices you can use include fresh or dried chilli, smoky paprika, cumin and oregano. Add them with the garlic until they release their aroma

Add the beans, stirring to incorporate the aromatic oil. If the mixture is too dry, add some broth or water to achieve the desired consistency. Leave them undisturbed for a minute or so to let a crust develop, then fold the crust into the bean mixture. Take care not to burn the beans!

I’ve been known to throw in a couple of tomatoes or left-over cooked veg, and even left soup from the day before. Keep stirring until most of the extra water has evaporated and the beans have formed a soft paste

The whole process can be repeated a second time the following day. Just make sure you refrigerate the beans as soon as they’re cool enough

How To Enjoy Refried Beans

Mexican black beans are fantastically versatile and can be enjoyed in lots of ways. Here are a few serving and pairing suggestions to elevate your veggie table:

1. Side dish: Mexican beans are a delicious side dish with any Mexican-inspired meal. In fact, any meal at all. They pair particularly well with corn-based dishes like enchiladas and tacos, and also with tamales

2. Refried beans are used to fill tlacoyos: doble-layered, oval tortillas with a beany centre. I’ll share the recipe for these in a later post. Meanwhile, check out this recipe for bean tlacoyos

3. Enfrijoladas: refried beans are loosened with vegetable broth and used to coat soft corn tortillas. Fill them with cheese or something else yummy, then fold or roll them onto a serving dish. Add your favorite toppings: if you’re not vegan, try soft crumbly feta, or a hard cheese for melting under the grill. If you’re vegan, try lightly roasted roughly crushed pupmkin or sesame seeds, hazelnuts or whatever you have to hand. Top with your favourite salsa and enjoy

4. Mexican black bean soup: Add the refried beans to vegetable broth to create a hearty and nutritious bean soup. Spice it up with chipotles in adobo or La Vera Spanish paprika, add more herbs of your choice and top with a dollop of sour cream or non-dairy yoghurt. Garnish with chopped coriander and a squeeze of lime for an final burst of flavour

homemade mexican refired black beans
Refried Black Beans Recipe
Prep Time 1 day
Cook Time 15 minutes
Course any
Cuisine Mexican
Ingredients
  
  • cooked Mexican black beans home-made or store bought
  • a generous quantity of good oil eg oilive oil
  • 1 large onion finely chopped
  • garlic to your taste
Condiments
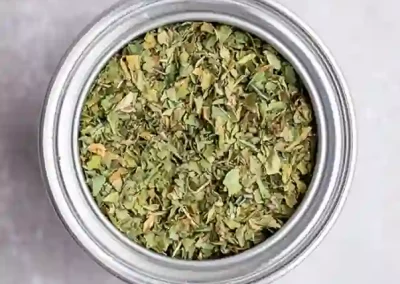
  • fresh or dried epazote, oregano, marjoram or thyme or any of your favourite herbs
  • chipotles in adobo
  • smoky La Vera paprika (available as sweet, sweet-sour or spicy)
Optional Extra Ingredients
  • chopped skinned tomatoes
  • chopped sweet capsicums
  • chopped fresh green or red chillies
Instructions
 
  • heat a generous amount of oil in a pan, add the finely chopped onion and sauté until soft and translucent
  • add the capsicums and chiilies if used until they begin to soften
  • add the garlic and herbs and cook until aromatic
  • now add the beans, stirring to incorporate into the aromatic oil. If the mixture gets too dry, add some broth or water to achieve the desired consistency
  • every now and then, leave the beans undisturbed for a minute or so to develop a crust, then fold the crust into the bean mixture. Take care not to burn the beans
  • add extra ingredients such as tomatoes
  • I've been known to throw in leftover cooked vegetables or the remains of yesterday's soup
  • continue to stir the mixture until it has the consistency you like and smells divine
  • serve with a vegetable dish and rice or corn tortillas for a Mexican feast
  • or serve them as an accompaniment to any meal
  • refried beans like a garnish of crumbly cheese such as Mexican Cotija, Greek Feta or Turkish Lor
Keyword beans, Mexican, re-fried, rechauffe

Mexican Black Beans


Nixtamalization Of Corn: Secret Of Ancient America


Baked Beans À La Différence


Paella A La Mexicana

Roasted Tomato And Garlic Soup With Figs


Fermented Plums: Powerhouse Of Flavour And Nutrition

Home Page


Subscribe To Posts

Loading