Mexican Fruit Drinks: 3 Refreshing Non-Alcoholic Drinks Recipes Perfect For Any Occasion
Refreshingly Fruity & Floral: Non-Alcoholic Drinks Recipes to Enhance Any Meal
It’s often said that Mexican food loves a cold beer. Few would argue with that. But with research increasingly showing there is no safe limit to consuming alcohol, Mexican “aguas”, made from fresh fruits and flower infusions, are a fantastic healthy and authentically Mexican alternative to bring tropical freshness to those spicy-hot tacos, burritos and quesadillas
From mango, lime and tamarind to hibiscus flower and watermelon agua fresca, “aguas” are ubiquitious throughout Mexico, to be enjoyed all by themselves, or to accompany and enhance any meal
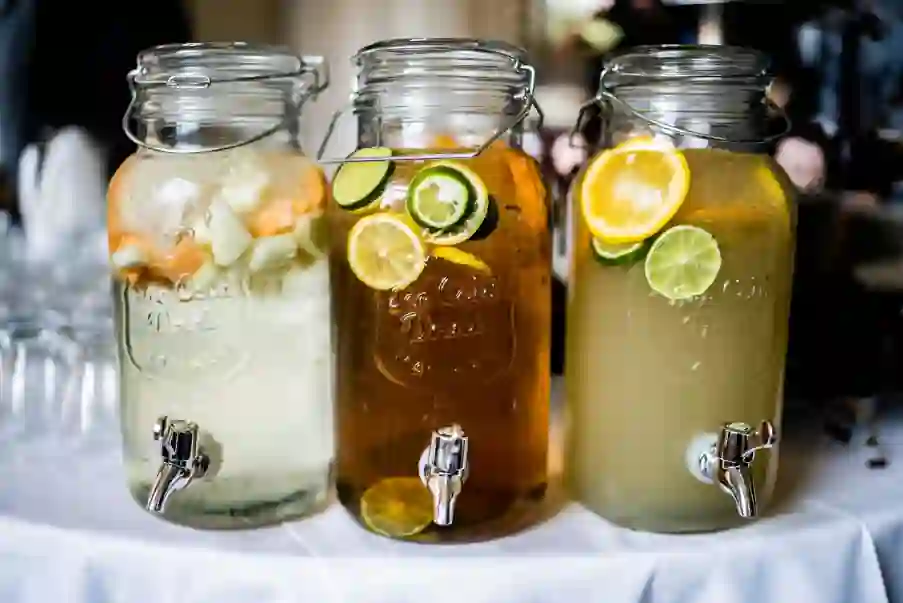
Transport yourself to the colorful streets of Mexico with a sip of our three aguas frescas. Simply made with flower infusions, ripe fruit, water and a touch of your favourite sweetener, these light and refreshing drinks are the epitome of Mexican authenticity
Here are three of our favourite Mexican nonalcoholic drink recipes to get your taste buds – and your guests – dancing
Agua De Limón: The Original Mexican Limeade
Agua de limón, also known as Mexican limeade, is a quintessential thirst-quenching beverage that has been a staple in Mexican households for centuries. This simple yet delightful drink is made with fresh, juicy limes, water, and a touch of sweetness, creating a perfect balance of tangy and refreshing flavours
What we call limes in Europe and the US in Mexico are a variety of lemon. Limes (Lima) proper, though of the citrus family and externally similar, are a whole different fruit with an intoxicating perfume and intense sweetness – reminiscent of bergamot, but different!
This recipe uses the lemony-lime we know and love. The whole fruit is blitzed in a blender or food processor with spring-water, the thin skins adding just a hint of zesty bitterness to balance the refreshing sharpness of the juice.
Thin-skinned lemons (also used to make Moroccan preserved lemons) work just as well. The commoner thick skinned lemons I find too bitter and are best squeezed into a classic lemonade.
The trick is control the degree of maceration of the fruit to avoid over-bitterness. You achieve this by blitzing the limes in water for just 5 seconds. Then strain immediately. Finally, dilute to taste with extra water, sweeten, add plenty of ice, et voilá
Certain to transport you to the vibrant streets of Mexico with every sip, the bright, citrusy flavor agua de limón is a perfect accompaniment to any spicy Mexican dish, and a stand-alone thirst-quencher on a hot – or cool – day.
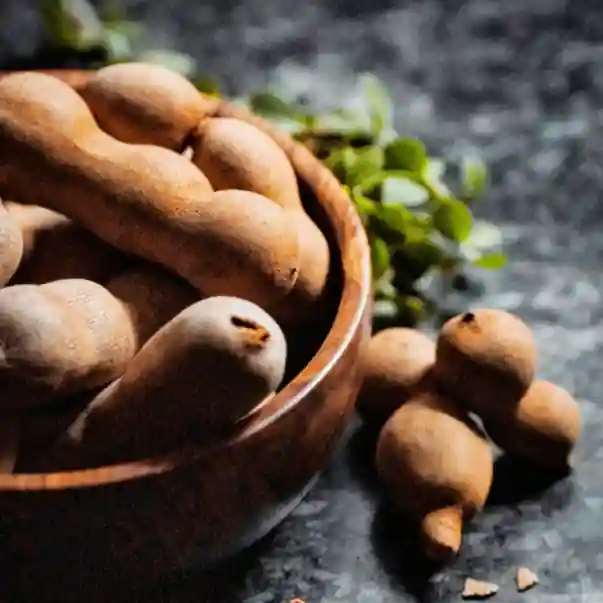
Agua De Tamarindo: Tamarind Water
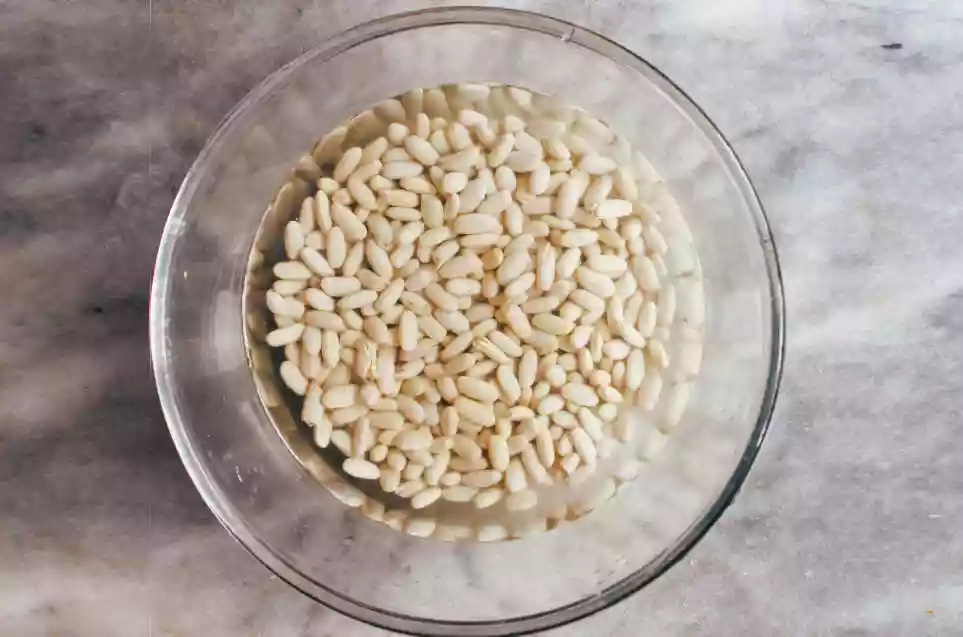
Tamarind is a tropical fruit native to Africa, but like chillies, tomatoes, coffee and so many good things it now grows in tropical climes around the globe. Popular in South Indian, Thai and other Asian savoury dishes, it has a sharp and fruity flavour profile which lends itself equally well to sweet dishes and drinks
A legume, like peas or peanuts, fresh tamarind is prepared by cracking open the brittle skins, removing the fibrous veining surrounding the sweet pulp and finally de-seeding. Fresh tamarind is sweet enough to enjoy directly as an after dinner fruit
Without doubt the fresh pods yield the best tamarind water. Nevertheless, I’ve had very decent results from the more commonly available pressed tamarind blocks. Sharper and less sweet than their fresh counterparts, tamarind blocks retain much of their fruity aroma to enjoy as a sweet drink.
Tamarind blocks may come as the compressed whole fruit (fibrous veining, seeds and all) or a de-seeded tamarind flesh. Both require soaking in hot water and straining to obtain the juicy pulp
Dry tamarind powder and tamarind concentrate, while good in savoury dishes, are not recommended here, the former having lost much of its fruitiness in the drying process, and the latter usually containing salt and other condiments not suitable for our sweet, refreshing drink


Agua De Flor De Jamaica: Hibiscus Water
Effectively a chilled hibiscus tea, Mexican Flor De Jamaica uses only the dried flower petals, avoiding the much sharper hibiscus “hip” (the equivalent of a rose-hip)
The result is subtly floral with a gentle sharpness for balance. The dried flowers are readily available in Mexican outlets. If you go for any other hibiscus tea, make sure you source one containing the flower-petals only

- 3-4 limes preferably unwaxed
- 1 litre spring or tap water
- sugar, honey, stevia or other sweetener to taste
- ice
- mint and / or lemon verbena optional
- wash the lime, cut into quarters and put them into the jug of a blender or food processor
- add water to just cover the limes and pulse for no more than 5 seconds in total to avoid excessive bitteerness
- strain the lime juice into a jug, add the remaining water
- sweeten to taste then add some ice plus a few mint and or lemon verbena leaves

- 15-20 sweet tamarind pods peeled, de-veined and de-seeded
- 10-12 cups water
- sugar or other sweetener to your taste
- 100 grams tamarind pulp
- 5-600 ml water
- sugar or other sweetener to your taste
- Place the prepared tamarind in a heat-proof bowl or pan
- boil half the water and pour onto the tamarind pulp
- let infuse around 15 minutes
- for best results strain the hydrated tamarind pulp to remove any fibrous bits
- sweeten to taste
- add the remaining water in the form of cold water or ice
- chill and enjoy
- 6-7 cups water
- 1.5 cups dried hibiscus flowers
- sugar or other sweetener to taste eg stevia, agave nectar, etc
- boil 3 cups of water
- in a pan infuse the hibiscus flowers in the boiled water off the heat for 10 minutes
- sweeten to your taste
- add a further 2 cups of cold water, and plenty of ice, adjusting the sweetness as needed
- chill till very cold and enjoy
Health Benefits of Mexican Fruit Drinks
Aside from their delicious and refreshing qualities, traditional Mexican fruit drinks offer a range of health benefits that make them an excellent choice for quenching your thirst or accompanying your meal
These beverages are not only packed with essential vitamins and minerals, but they also provide a natural, lower-calorie alternative to the more sugary sodas and even fruit juices
A major advantage of these traditional Mexican beverages is their hydrating properties. Agua frescas, are primarily composed of water, making them excellent choices for staying hydrated. The addition of fresh fruits and herbs not only enhances the flavor but also provides a natural source of electrolytes, such as potassium, to help replenish what is lost through sweating
One of the standout health benefits of Mexican fruit drinks is their high antioxidant content. Fruits like limes, tamarind, and hibiscus are all rich in vitamin C, which is a powerful antioxidant that can help protect the body from free radical damage and support a healthy immune system.
Additionally, these fruits contain a variety of other beneficial plant compounds, such as polyphenols, that can help protect your heart, reduce inflammation and support immunity to promote overall well-being
Subscribe To Posts